Resources
 Part of the Oxford Instruments Group
Expand
Collapse
Part of the Oxford Instruments Group
Technical Article
Author: Dr Alan Mullan
Published: 01 Jun 2019 · Last updated: 13 Dec 2023
In this article Dr. Alan Mullan, Product Specialist for Microscopy Cameras at Andor Technology shares some simple tips on how to get the best out of the imaging camera on your microscope. While the camera cannot make up for a sub-optimal sample conditions or preparation, it is certainly possible to get the best out your camera and obtain the best possible image quality. Some of these tips may seem simple but can be easily overlooked as we focus on the research tasks ahead.
Many microscopy cameras rely on USB 2 and USB 3 connections as a convenient system to communicate with the PC and transmit data. Some cameras use other high-speed connections such as CoXpress or Cameralink. Whatever the interface with the control PC, there is usually a PCIe card in the PC and it is recommended that this card is dedicated to the camera. Resource sharing can result in a loss of performance; potentially resulting in disruption to acquisition, or inconsistent and/or reduced frame rates. For this reason, Andor supply a dedicated PCIe card for reliable and consistent PC connectivity.
Modern computers are normally set by default to have power saving modes turned on by default. While this is good for the environment and for reducing energy costs, these may disrupt camera to PC communication during acquisition or triggering events. For this reason the power saving options should be turned off for the PCIe/camera controller card. This is easy to do under the device manager settings of your PC.
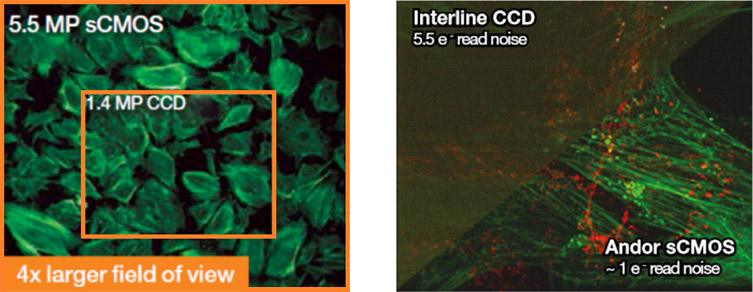
Different microscopes have different port sizes and mounting options. These may vary in size anywhere from 18 to 22 mm through a C-mount. Additionally, 25 to 32 mm are now available through either an F-mount and camera adaptor, or microscope specific T-mount. Cameras also come in a range of sensor sizes and pixel sizes and now can have larger sensor sizes than microscope port sizes. Two considerations we need to make are as follows:
| Objective Magnification | Objective NA | Coupler magnification | Effective pixel size (µm) | Oversampling (Nyquist) |
| x100 | 1.49 | x1 (none) | 11 | 2.23 |
| x60 | 1.4 | x1.5 | 7.3 | 2.14 |
| x60 | 1.4 | X2.0 | 5.5 | 2.85 |
| x40 | 0.95 | x1.5 | 7.3 | 2.10 |
| x40 | 0.95 | x2.0 | 5.5 | 2.8 |
Camera control software should always be the latest available version to ensure you get the best performance from your camera. Like all software, new features as well as bug fixes are included in the latest version. For some software such as micro-manager “Nightly builds” or NIS-elements “hot patch” versions may be available which provide improved camera support on a frequent basis. Other software may be released less frequently as a full release. Whatever the release schedule of the software it is important that you keep up to date.
Camera control software provides many different options. It is important to ensure that these match the imaging needs (refer to the separate sections for sCMOS and EMCCD cameras).
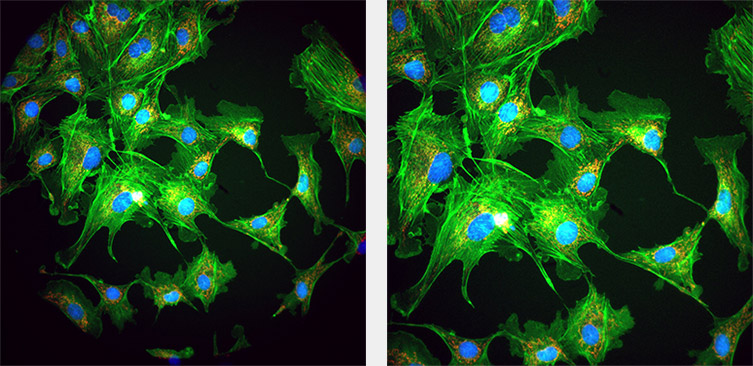
Generally, we want to set the exposures and the illumination intensities as low as possible to get the most accurate measurements of cell physiology, particularly for live cell imaging. Modern fluorophores are brighter and more stable and when coupled with high sensitivity cameras allow for experiments with low fluorophore concentrations.
Cameras are typically most sensitive around 500-650 nm; this is great for many of the main fluorophores in life science research like GFP. So, bear in mind that when working outside of these standard areas towards the UV or NIR ends of the spectrum, the camera Quantum efficiency or QE (a measure of the sensitivity of the camera to light) will drop off and exposures may need to be increased accordingly.
Different camera sensors will have a different QE response to wavelength of light, so you should check the QE curve specific to your camera model so you can check the impact on your experiments. Some cameras like the iXon Ultra series have special sensor coating options that are designed for high sensitivity at UV or NIR wavelengths.
sCMOS cameras are very flexible in terms of imaging and have many settings available. It is therefore important to make sure these are set to match the experiment you are doing. For high speed imaging you should look for high speed settings, sometimes this may be referred to as “12-bit mode”. For high dynamic range imaging you should look for High Dynamic range sometimes shown as “16-bit” mode. There are also a range of triggering modes – refer to your camera manuals for full informations.
For EMCCD cameras there are some extra settings such as EM gain that need to be considered. This can seem a bit confusing, however there are some general guidelines. For example, you should not increase EM gain beyond what you need. Cranking up the EM gain can result in what is called EM aging, resulting in a decrease to sensitivity of the camera over time. Andor have made setting up the iXon EMCCD cameras simple by using pre-set options called Optaquire, which makes it easy to select optimal settings for experiments such as highest sensitivity or for higher speeds. This is also an excellent starting point to base acquisition settings for custom experimental setups.
There are several ways to get the best time resolution for fast moving objects or processes.
Heat is the enemy in terms of obtaining good quality images. Basic microscopy cameras may have passive cooling, or even no cooling, meaning that the image may be much noisier than we would like. As exposure times increase and dark current noise becomes a dominant factor, heat becomes a problem. For this reason, scientific cameras normally feature some type of active cooling to reduce the dark current noise as much as possible. For sCMOS cameras cooling also removes other types of noise that would appear such as hot pixels or blemishes. Cooling the sensor will therefore mean we can get not only a better looking, higher fidelity image but also the camera will be more sensitive at detecting image information since the noise floor has been reduced. Andor Cameras such as the Sona back-illuminated sCMOS use a permanent vacuum enclosure for the sensor called UltraVac™ which means the deepest cooling is possible. For further information on cooling in sCMOS read the article TE Cooling of sCMOS
As a general note, make sure to follow the manufacturers guidelines for operation temperature range so that the camera is capable of cooling to its full potential.
If you have had your imaging camera for some time it may be that a new camera model can provide a real boost to your microscope and what it is capable of:
Additional Resources

© Oxford Instruments 2026