Resources
 Part of the Oxford Instruments Group
Expand
Collapse
Part of the Oxford Instruments Group
Technical Article
Author: Dr. Geraint Wilde, Dr. Judith Beer
Published: 01 Mar 2025 · Last updated: 16 Apr 2025
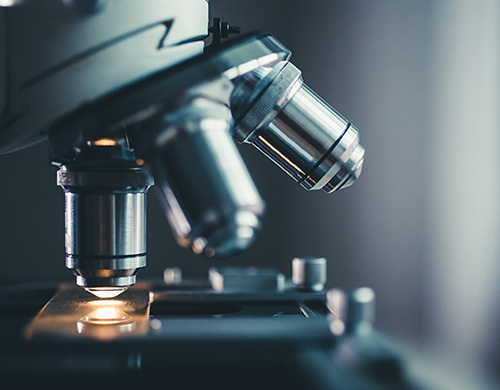
When looking for a fluorescence microscope, you will find yourself confronted with a diverse range of options. The systems range from entry-level, small widefield microscopes to fully automated high-end versions with super-resolution capabilities. In addition, a variety of small benchtop systems have entered the market, promising high quality imaging results, easier handling and a more affordable prize. But which microscope is ultimately the best choice for your specific needs and resources?
This article provides a comprehensive overview of key aspects to consider when selecting a fluorescence microscope, empowering you to make a well-informed choice. We address essential technical and practical criteria the microscope should fulfil by targeting the following questions:
Click on the buttons to navigate in the article
Benchtop microscopes are systems that fit on the top of a regular laboratory bench. In this article, we use the term for the group of compact, often cuboid-shaped fluorescence microscopes with an enclosed design. They form the alternative to “traditional” microscopes that follow the classical open-framed design.
Both “traditional” and benchtop microscopes offer a range of imaging techniques and varying qualities of technical and optical components. The "right" technical setup is primarily dependent on the specific requirements of your application: What will you image? What resolution is needed? What are the characteristics of your sample? It is crucial that the answers to these questions predominantly guide your selection of the microscope configuration.
There are multiple imaging techniques available for fluorescence imaging approaches, each having their advantages and disadvantages. They differ especially in their capabilities to resolve structures close to the diffraction limit in xy and z. They also use different sample illumination in terms of intensity and area which influences photobleaching and phototoxicity effects. Additionally, the imaging speed, ease-of-use and costs are significantly different for the individual techniques. For these reasons it is essential to compare and choose the best-fitting imaging option based on your individual application and resources.
Widefield Fluorescence Microscopy
Widefield fluorescence microscopy is the fastest, easiest and cheapest option but has a low performance in depth resolution and at times image clarity. Here, large areas of the sample are illuminated with usually low intensity light and both in-focus and out-of-focus signals are detected. Widefield microscopes are a very good choice for basic applications that do not require the high-resolution and imaging of delicate samples or those with a very little fluorescent signal. It is however not optimal for the detection of structural details especially in thicker samples and for imaging in depth such as is needed for 3D analyses.
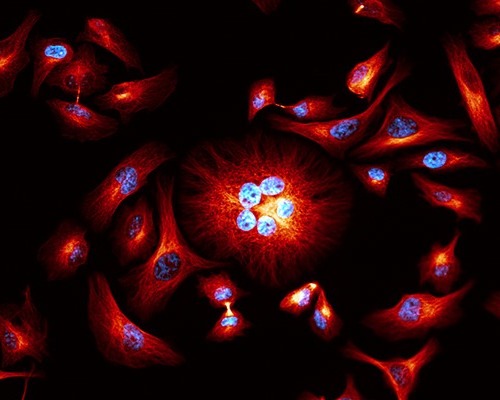 Widefield image of cultured cells. Red: alpha-tubulin, blue: DAPI. Image courtesy of Motosuke Tsutsumi National Institute for Physiological Science, Japan.
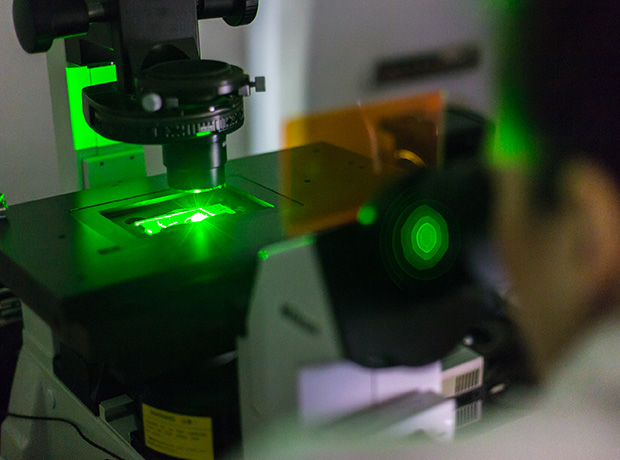
Confocal fluorescence microscopy detects signal only from the in-focus plane and thus allows for a good resolution in depth and the imaging of structural details even in multi-layered samples. Confocal microscopes are grouped in laser scanning microscopes and multi-point (spinning disc) microscopes. Laser scanning microscopes image the sample one point at a time using a pinhole, which can resolve structures down to the diffraction limit. As a downside, they are very slow and require high laser intensities for illumination, which negatively impacts live sample imaging approaches. The faster, easier to handle and less costly alternative to laser scanning microscopes are spinning disc microscopes, which can even come in form of benchtop microscopes. The photobleaching, phototoxicity and the imaging duration are drastically reduced here, as these microscopes use hundreds of pinholes arranged on a rotating disc at a time. This makes spinning disc microscopes also suited for live imaging.
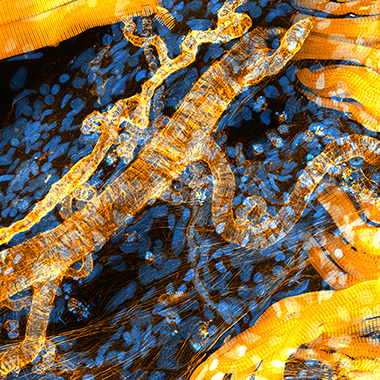
3D confocal image of anastomotic vessels within an adult zebrafish. Yellow: phalloidin, blue: DAPI. Image courtesy of Julien Resseguier, University of Oslo, Norway.
Super-resolution microscopy enables light-based imaging with a resolution beyond the diffraction limit. It often involves the use of costly and complex high-end systems that rely on different physical principles and technologies.
In STORM (stochastic optical reconstruction microscopy) and PALM (photoactivated localization microscopy), imaging is performed in the widefield modus and the stochastics of fluorescent events is used to discriminate individual fluorophores. This way, they can resolve structures down to 50 nm in STORM and 20 nm in PALM. As a drawback, the imaging is slow, as multiple images are recorded at the same position. The same is true for SIM (structured illumination microscopy), a technique that uses a striped pattern for partial illumination to increase the spatial resolution by a factor of two. STED (stimulated emission depletion microscopy) can resolve structures below 70 nm by bleaching surrounding areas with high laser intensities. This causes a high level of phototoxicity and sample bleaching. STED is a laser-scanning technique, which makes imaging particularly slow.
 STED super-resoultion 3D image of tubulin in COS 7 cells. Color-coding according to depth. Scale bar: 5 µm. Image courtesy of Daniela Malide, NHLBI Light Microscopy Core, US.
As an alternative to the high-end super-resolution microscopes, deconvolution software can be used to enhance the spatial resolution in images obtained from widefield or confocal fluorescence imaging, though not to as high a resolution. The algorithms use the mathematical principles of the point-spread function to reassign the origin of the fluorescence signal and are faster to work with.
Learn more about the different microscopy techniques here: Overview of Microscopy Techniques for Life Sciences
The optical elements including the objectives, detector and light source are the main components determining a microscope’s quality, performance and price. Other relevant elements are the filters, dichroic mirrors and the motorization of components. In the following we give a short overview which elements you should focus on when comparing products.
Review a detailed list of the microscope components and how they impacts the price here: Confocal Microscope Price – The Impacting Factors
Objectives play a crucial role in microscope performance and should be carefully selected based on the specific application. These are the most relevant features for you to consider:
In general, the performance of the objectives should match the complexity and price of the microscope itself and the imaging application. Relatively inexpensive objectives are suitable for low-level routine imaging. For high-resolution and spatially accurate confocal imaging, that rely on high-end technological systems, investing in the highest quality and more expensive optics is recommended. It is worth noting that some objectives are designed and optimized for specific sample types, such as thick samples. Although they may slightly compromise resolution or correction, they are often the best option for their respective applications.
Detectors
In most microscopes, the detector is a camera equipped with a sensor composed of thousands of pixels. There is a wide range of capabilities and prices you can choose from. The following four key criteria are important to keep in mind to simplify the selection process:
In most point scanning confocal microscopes, photomultiplier tubes (PMTs) are used for signal detection. These capture one image by pixel, as the illumination light (laser) scans across the image. Consequently, PMTs do not have a fixed X and Y field size or a fixed pixel size, as both can be adjusted as needed. In comparison to cameras, which can capture e.g. a 2000 x 2000 pixel image in 100 ms, image acquisition with PMTs is considerably slower and takes several seconds for the same size image. PMTs are also less sensitive, with a QE of around 48 % in more expensive detectors, meaning they typically cannot detect low fluorescence signals as well as cameras can.
The optimal light source for a microscope varies with the imaging technology. Most modern microscopes use LED technology for widefield imaging, replacing older technologies such as mercury lamps and metal halide. For more advanced techniques like confocal microscopy, laser technology is necessary. Lasers are more expensive than LEDs, but they are essential for obtaining high-contrast and high-resolution images in confocal microscopy. In some instruments that incorporate confocal technology, it is possible (though not yet common) to use laser illumination for widefield imaging as well. This allows for the retention of widefield imaging sensitivity while also enabling high-resolution confocal imaging in one instrument.
 It is important to note that laser safety technology is crucial when working with lasers, particularly for inexperienced users. Manufacturers implement interlock systems that deactivate the laser light when a protective device is not in place. Closed-box microscopes should typically eliminate the risk, as the system remains enclosed during imaging.
The primary consideration for the microscope stage is whether you need a motorized stage for high productivity imaging or like to operate the system with a manual stage. Motorized stages enable a systematic navigation on the sample, allowing for repeated visits to multiple positions. This is extremely useful for time-series imaging, such as experiments on living samples. Motorized stages also facilitate imaging of large areas, as required for tissue samples that exceed the field of view. This can be achieved by automatically capturing multiple tiles and stitching them into a single high-resolution image.
When comparing motorized stages, it is important to assess their movement speed as well as their accuracy and reproducibility when revisiting positions. A minimal displacement in the x and y directions is desirable and will be relative to the magnification and resolution you need to achieve, e.g. to avoid sample movement jitter in time-series imaging.
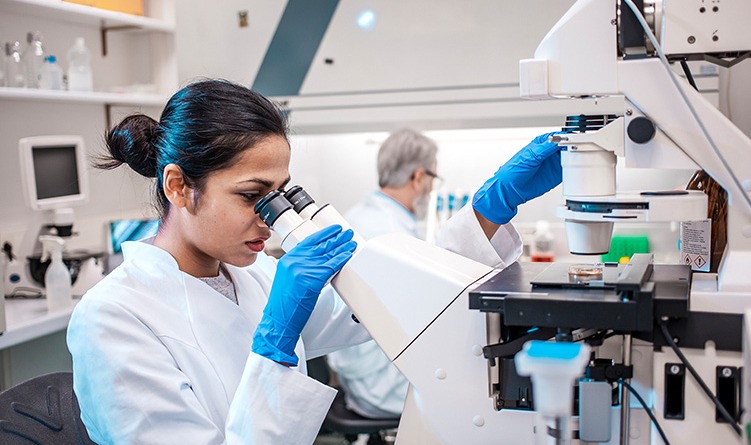
Another key aspect for you to consider in a microscope is the knowledge level and demands of the microscope users.
For multiple users with varying levels of experience, a fluorescence microscope should be safe, easy to use and robust, while still producing high-quality images. Ideally, the interaction with the microscope can be minimized through automation options and an intuitive operating software.
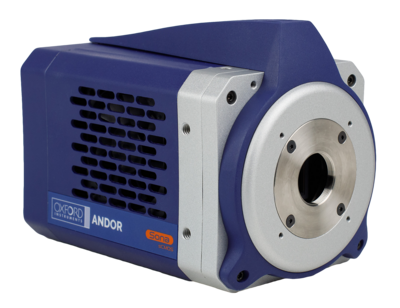
These requirements are often met by the new class of benchtop fluorescence microscopes. They have most of their technical components motorized and housed within a compact enclosure. The samples are loaded through an opening lid or small aperture, which prevents a direct contact of the user with the technical and optical components. Both sample navigation and image capturing are digital, providing convenient access through displays. In terms of performance, boxed microscopes have made significant advancements in in recent years and are even available for confocal and high-resolution imaging.
Experienced users who want to push the limits of their imaging approaches often value high performance, flexibility and adaptability in a system. In this case, the criteria for a microscope lie more in the technological specifications, ability to integrate different imaging options and upgrade possibilities. Imaging automation might not be the first priority here but can significantly benefit the reproducibility and throughput in experiments.
Researchers interested in advanced operations often prefer the more traditional, open-frame microscopes that allow for modification and customization of the instrumentation. Some boxed microscopes also offer adaptation possibilities, but these are usually limited to the options provided by the manufacturer.
The location where the microscope will be positioned is a next factor that should be considered before purchasing a system. Many imaging approaches are sensitive to light or temperature and require protection from environmental influences. For other applications, the microscope needs to be located in a specialized room due to e.g. certain safety regulations. Therefore it is essential to verify the suitablilty of the instrument for your application and the conditions in your facility.
Surrounding light is a general issue in fluorescence microscopy. In addition to the photobleaching effect of light on fluorescent samples, environmental light can overshadow weak fluorescence signals during microscopy and introduce high background noise in the image.
Environmental light is particularly problematic in unshielded microscopes of the inverted type, where the objectives face upwards towards light source such as the ceiling light or sun. Unshielded microscopes typically require a light-controlled environment, which is usually a darkroom. An alternative solution is to use boxed systems such as benchtop microscopes that are contained in a housing that prevents light penetration.
Temperature is another relevant environmental factor, especially for imaging at high magnifications (e.g. 60x or 100x) and when super-resolution imaging is a goal. The microscope’s metallic components, such as objectives, are sensitive to even slight temperature shifts, which can result in changes in focus and even lateral displacements. This can significantly impact accurate mappings, the tracking of features over time, and 3D imaging.
Boxed microscopes, compared to open-frame microscopes, are less susceptible to temperature fluctuations, although not entirely immune. Maintaining a stable temperature around the microscope and reducing the effects of sunshine, uneven ventilation and air conditioning is therefore critical for all high-resolution approaches.
Disturbances through vibrations are particularly an issue for imaging at high magnifications and super-resolution imaging. It is essential to minimize vibration by providing a stable environment to achieve a good imaging quality.
High-end microscopes are often placed on specialized active anti-vibration tables, which can be bulky and expensive but are the most reliable tool for damping vibrations. For smaller microscopes, there are alternative solutions available, such as anti-vibration plates. These plates can be placed on a regular bench and are designed to fit the microscope's footprint. While they may not offer the same level of vibration reduction as the active anti-vibration tables, they provide a more compact and cost-effective option. Many boxed benchtop microscopes have built-in vibration management solutions as part of their core design ensuring stable imaging performance.
Ideally, your microscope can be positioned close to your daily workflow. Expensive and sensitive fluorescence microscopes are often located in a dark room or core facility that also ensure a controlled environment. However, for samples that require a specific preparation immediately before imaging, which needs to be done in the location of the usual workflow, such as a cell culture room, this can be challenging. In some experiments, these preparations may be time dependent and getting to a remotely located microscope can cause time-critical issues for the researcher.
One solution to this is to use automated microscopes that allow researchers to prepare samples in batches during the image capture process. In the best case, the imaging can be performed directly in the room where the experimental workflow takes place. This is also beneficial when you work with specimens of a higher safety level (S2, S3, S4), that are typically not permitted in microscope facilities. For this, compact systems such as benchtop microscopes that take minimal space in the lab are best suited, given that they provide the required performance for your imaging application.
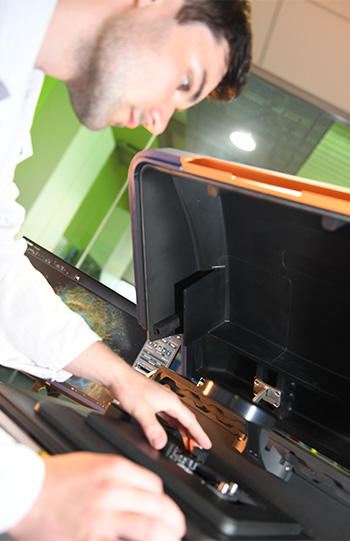
Dependent on your current needs and how they might develop in the future, it is important to consider the flexibility of your microscope base. This is often also a matter of your financial resources. Systems that offer the ability to be upgraded with additional components or advanced optical methods such as confocality or super-resolution may have a higher initial cost. However, when obtaining funding for new instrumentation is challenging, it is easier and ultimately more cost-effective to upgrade an existing system rather than purchasing an entirely new microscope.
The advantage of having the option to upgrade your system at a later time is not limited to traditional microscopes but can also be found in some newer generation boxed microscopes. When considering upgrades, it is important to evaluate the potential disruption to your research, whether the upgrade can be performed in the field or if the microscope needs to be returned to the manufacturer. We recommend reviewing the available upgrade options for your preferred microscope to make an informed decision that aligns with your evolving needs.
Learn more about the components relevant for microscope upgrades here: How to Upgrade Your Microscope

© Oxford Instruments 2026