Resources
 Part of the Oxford Instruments Group
Expand
Collapse
 Part of the Oxford Instruments Group
Andor Solis 2.24 introduces a new feature allowing the user to recalibrate the dispersion parameters following a change in the system (e.g., changing camera or turret). The Dispersion Optimiser has been designed to fine-tune the dispersion coefficients ensuring more accurately labelled spectra on either side of the selected centre wavelength.
Using at least 2 known spectral peaks of a calibrated light source on each grating will ensure that the new values calculated are optimised for the useful wavelength ranges on all installed gratings. A good calibration will be obtained if 2 wavelengths on each grating are tracked, at a total of 6 if there are 3 gratings installed.
The wavelengths selected should be from either side of the wavelength region of interest, e.g., if a grating is being used to obtain spectra in the region of 400 nm to 900 nm then, using a Hg light source for example, the 912 nm line should be used to ensure accuracy at the high end of the range and then either the 365 nm line or the 435 nm line in addition to cover the low end.
Note: This change is not reversible and therefore Andor recommend saving a copy of the original EEPROM before starting this process
The Dispersion Optimiser is found under the Calibrate menu in Solis.
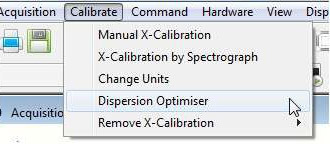
The Dispersion Optimiser menu is as follows:
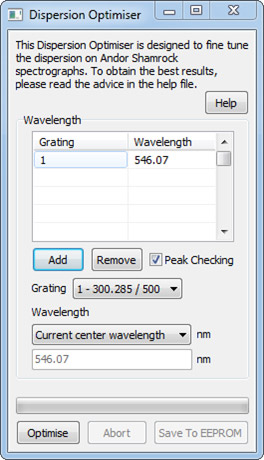
Select 1 grating, or the All Gratings Option:

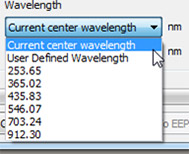
Select a suitable wavelength:
Add the selected gratings and wavelengths to the list
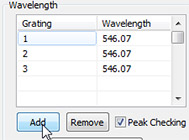
Repeat for all gratings and wavelengths required
If Peak Checking is enabled, the following dialog will pop up at each of your chosen wavelength points to confirm the correct peak is being displayed
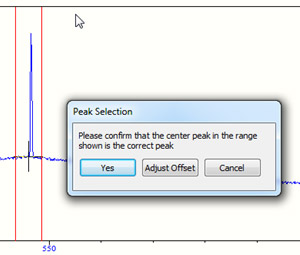
Two red lines will be drawn around the centre range being used - the user can confirm that the peak they are expecting is within this range
If the user selects ‘Yes’ the optimisation will continue
If not in range, select Adjust Offset
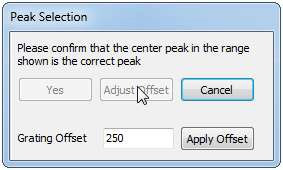
By adjusting the grating offset, move the peak and until it is in range
Selecting Cancel at any time will abort the current optimisation procedure
Once the operation is complete the following display will be added to the dialogue
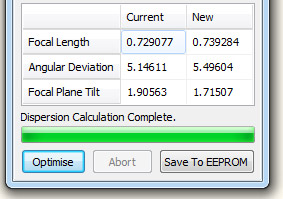
The ‘Current’ column shows the Optical Parameters currently in use, and the ‘New’ column shows the recommended values calculated by the Optimiser
Select Save to EEPROM to update the new values to the EEPROM of the Shamrock
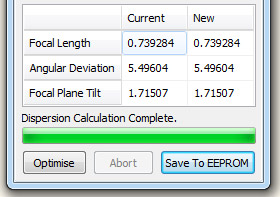
Once saving is complete the table of values will update to reflect the change in the current values
For further assistance, please contact your local Andor Support Representative.
