Connecting the Camera to the PC
The camera connects to a PC via
Installing the Camera Framegrabber Card
| Note |
|---|
| Camera operation with PCIe cards not supplied by Andor cannot be guaranteed. |
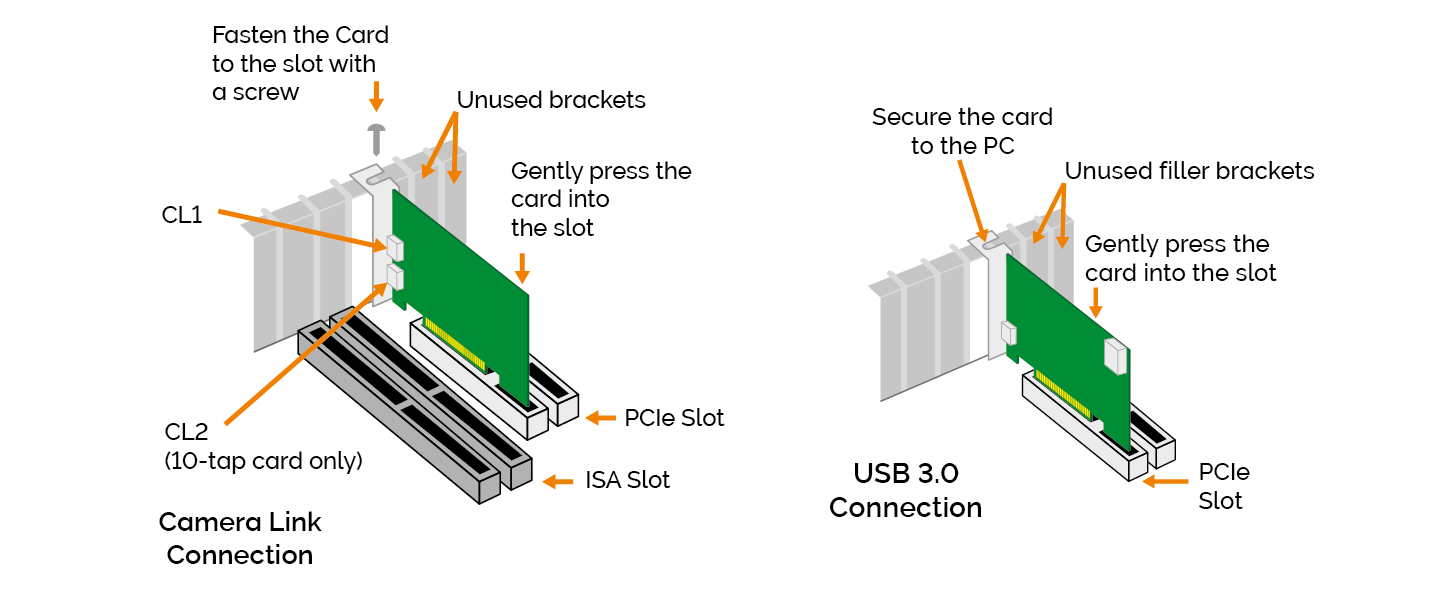
Installing the FrameGrabber PCIe card (Left) Camera Link versions and (Right) for USB 3.0.
-
Unplug all cables from the rear of the computer
-
Open the PC enclosure to gain access to the expansion slots.
-
Locate a suitable PCIe slot:
-
10-tap version: Framegrabber card operates in x8 or greater (i.e. x16 and x8 slots) ONLY.
-
3-tap version: Framegrabber card operates in x4 or greater (i.e. x16, x8 or x4 slots).
-
USB 3.0 version: Framegrabber card operates in x4 or greater (i.e. x16, x8 or x4 slots).
If you are unsure which slot is correct, please consult the PC user manual.
-
-
Remove the filler bracket corresponding to the slot you intend to use.
-
Remove the controller card carefully from its protective ESD packaging and insert the card connector fully into the expansion slot.
-
Ensure the card’s mounting bracket is flush with any other mounting or filler brackets to either side of it, then secure the controller card in place.
-
Replace the computer cover and secure with mounting screws if applicable.
-
Reconnect any accessories you were using previously.
Connecting the Camera to the PCIe Card
Connecting via USB
Connect the USB cable from the camera to the appropriate PCIe card on the control PC.
Connecting via CameraLink
Connect the CameraLink cable from the camera to the appropriate PCIe card on the control PC. Camera Link cables are labeled to assist with correct installation.
Connecting the Camera to the Power Supply
Connect the mains power cable between the camera power input